Warning, this page may have doll nudity and violent (according to my bf because he thinks it is cruel). Skip this page if you do not wish to see them.
 |
| The victim (according to my bf...) |
 |
| Victim and her new body |
Things that are needed for the transformation:
1) Little Pullip
2) Obitsu 23cm Body (white)
3) Some transparent elastic bands
4) Screwdrivers (slotted head and cross slot) Go google it.
I don't know about you, but i am very very bad at deboxing pullip doll. I spent more 30 minutes to debox her, and still i mess up >.<
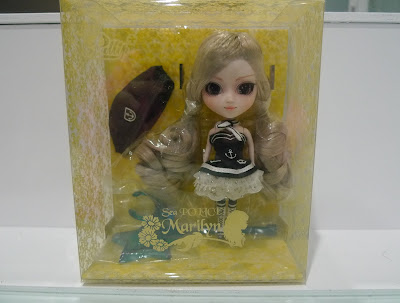
Anyway, this is how Little Pullip Sea Police Marilyn Doll look like. As you can see, she is tiny.
Begin with the back of the head, put the slotted head screwdriver underneath the wig and then slowly pry off the wig.
You can try pulling it off (my favourite part!) but slowly and carefully...only when the wig is loose enough.
I do it until it reach the opening gap for the head. I did not remove the whole wig off her head because i am lazy to glue them back after done and i do not wish to change her current wig. If you want to change her wig with different one, just remove the whole wig off her head.
When i come to this point..i was like shyt! I totally forgot about this hidden cross slot screw and I did not prepare the cross slot head screwdriver! As you can see from my previous picture, i only show 1 screwdriver.
Anyway, just pretend this is a cross slot head screwdriver (yes i forcefully remove the cross slot screw with a slotted head screwdriver and it work! hahaha! ). Remove the screw at the back. Just in case you don't know like me, turn anti-clockwise for removing, clockwise for installing.
After unscrew, remove the back part of head and......shyt...another 3 cross head screws hidden inside....
Again, pretend this is the correct screwdriver and remove the 2 screws at the bottom. Do not remove the one on top.
The body should be able to remove now. You do not need to screw them back.
 |
| Before and after elastic bands |
Tie elastic bands around the neck of Obitsu body. I need few of them to achieve the thickness.
Place the Obitsu body to the head like this and close back the head.
I make sure there is no gap between the head before i screw them back.
Try shaking her lightly by holding her chest, if there are sound from the head, unscrew and add more elastic band. Make sure the head is moveable to left and right too.
Once everything's done, pull down the hair and....
.
.
.
.
.
.
.
.
.
.
.
.
.
.
.
.
.
.
.
.
Viola!
Obitsu body is very pose-able!
Please take note that this reference are only applicable for the newer version of Little Pullip.
Hope you enjoy this post!


4 comments:
Wow, she is beautiful♥
Does this work with the little dal+? For example penpen?
Beautiful. But can she tilt her head as she could with the little body?
elle et trop belle <3 c'est un obitsu 21 cm ou 23cm
Post a Comment